WriteO Learning Guide: Polish and Publish Your Book (Part 3 of 3)
Your book is laid out and styled. This last guide covers the checks that catch problems, the cover, and the files you upload to KDP or IngramSpark.
In This Guide
Search Your Book with Match Case
Fix Typographic Mistakes
Check Your Writing with Insights
Preview on Real Devices
Design Your Cover
Run the Print Check
Export Your Book
Understand Export Credits
1. Search Your Book with Match Case
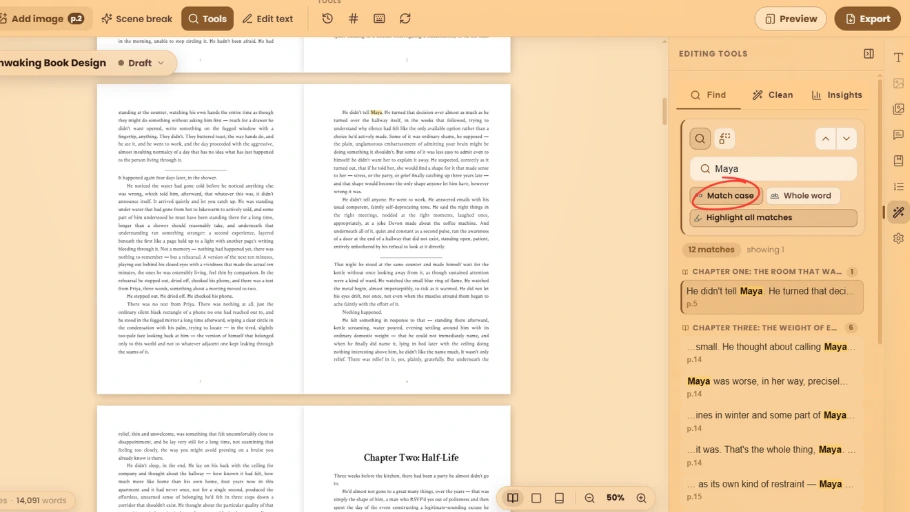
Use the search feature to quickly find words or phrases throughout your book.
Steps
Enter the word or phrase.
Enable Match Case when capitalization matters.
Review the results.
Select a result to jump to its location.
For example, Match Case can help distinguish WriteO from writeo.
💡 Tip: Use Match Case when checking character names, headings, or other important terms.
2. Fix Typographic Mistakes
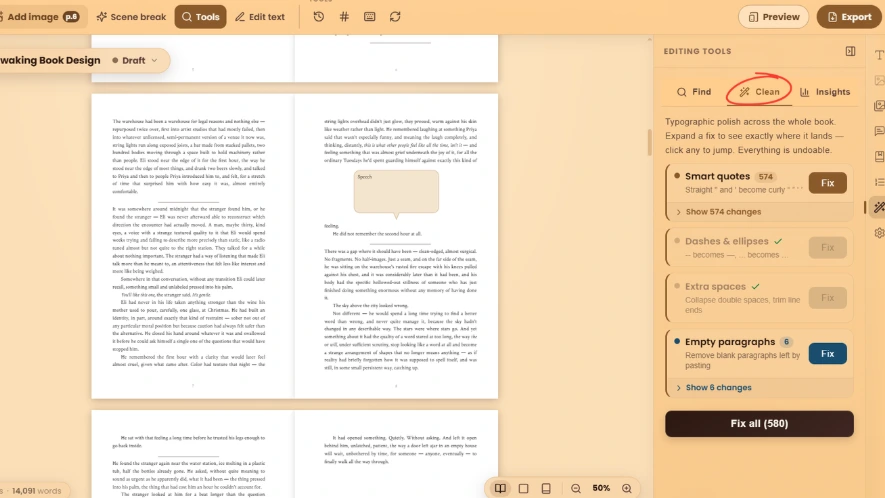
Use the typographic correction feature to find and fix common typography issues.
Steps
Open the typographic correction tool.
Review the suggested corrections.
Apply the appropriate changes.
💡 Tip: Review each suggestion before applying it to make sure it fits your text. If a change goes wrong, version history keeps snapshots you can restore.
3. Check Your Writing with Insights
Insights gives you a read on your manuscript before it becomes a book.
Steps
Open the editing tools panel.
Select Insights.
Review your stats: word count, sentence length, and estimated reading time.
Check your most-used words and filler words.
It also flags how often you lean on adverbs, which is the fastest way to spot a habit you can't see while drafting.
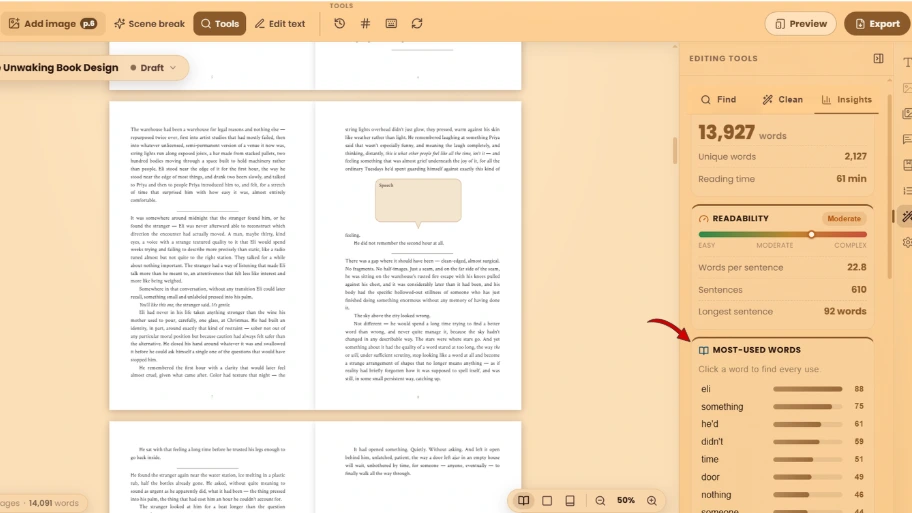
💡 Tip: Click any word in the list to jump straight to where you used it.
4. Preview on Real Devices
See your book as a reader will, on the device they'll actually use.
Steps
Open Tools.
Select Device preview.
Choose a device, such as Kindle Paperwhite.
Switch between EPUB and PDF views.
The preview re-runs the real layout at that device's screen size, so it isn't a mockup. Check that chapter openings, scene breaks and images all survive.
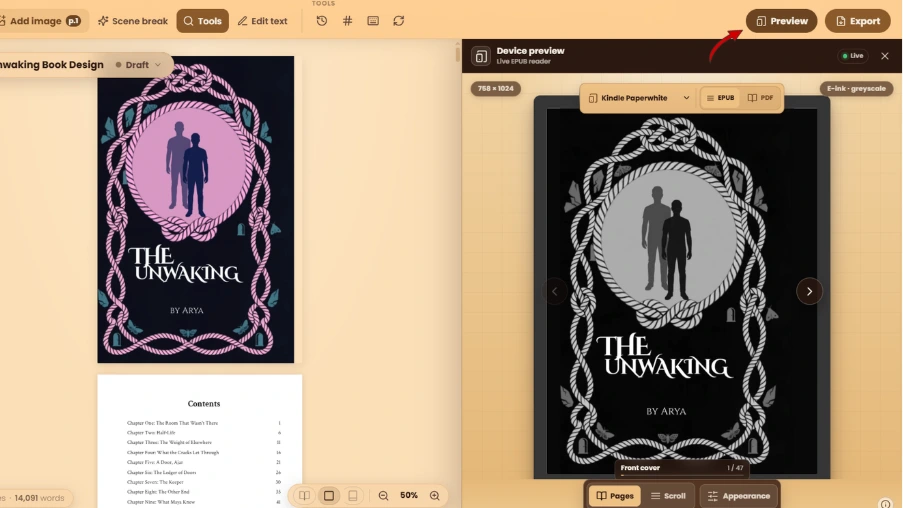
💡 Tip: E-ink is greyscale. Check that your cover still reads well without colour.
5. Design Your Cover
Build your front cover, spine and back cover on one artboard, then check it in 3D.
Steps
1. Open Cover.
2. Design the front using templates, text, images and shapes. Add your own pictures from Uploads, or decorative pieces from Elements.
3. Switch to Back and add your blurb.
4. Open Spine to add your title and author name, plus any spine artwork. Check the spine width, which is calculated from your page count and paper stock, or enter the exact figure your printer gives you.
5. Use the full-wrap view to see all three together.
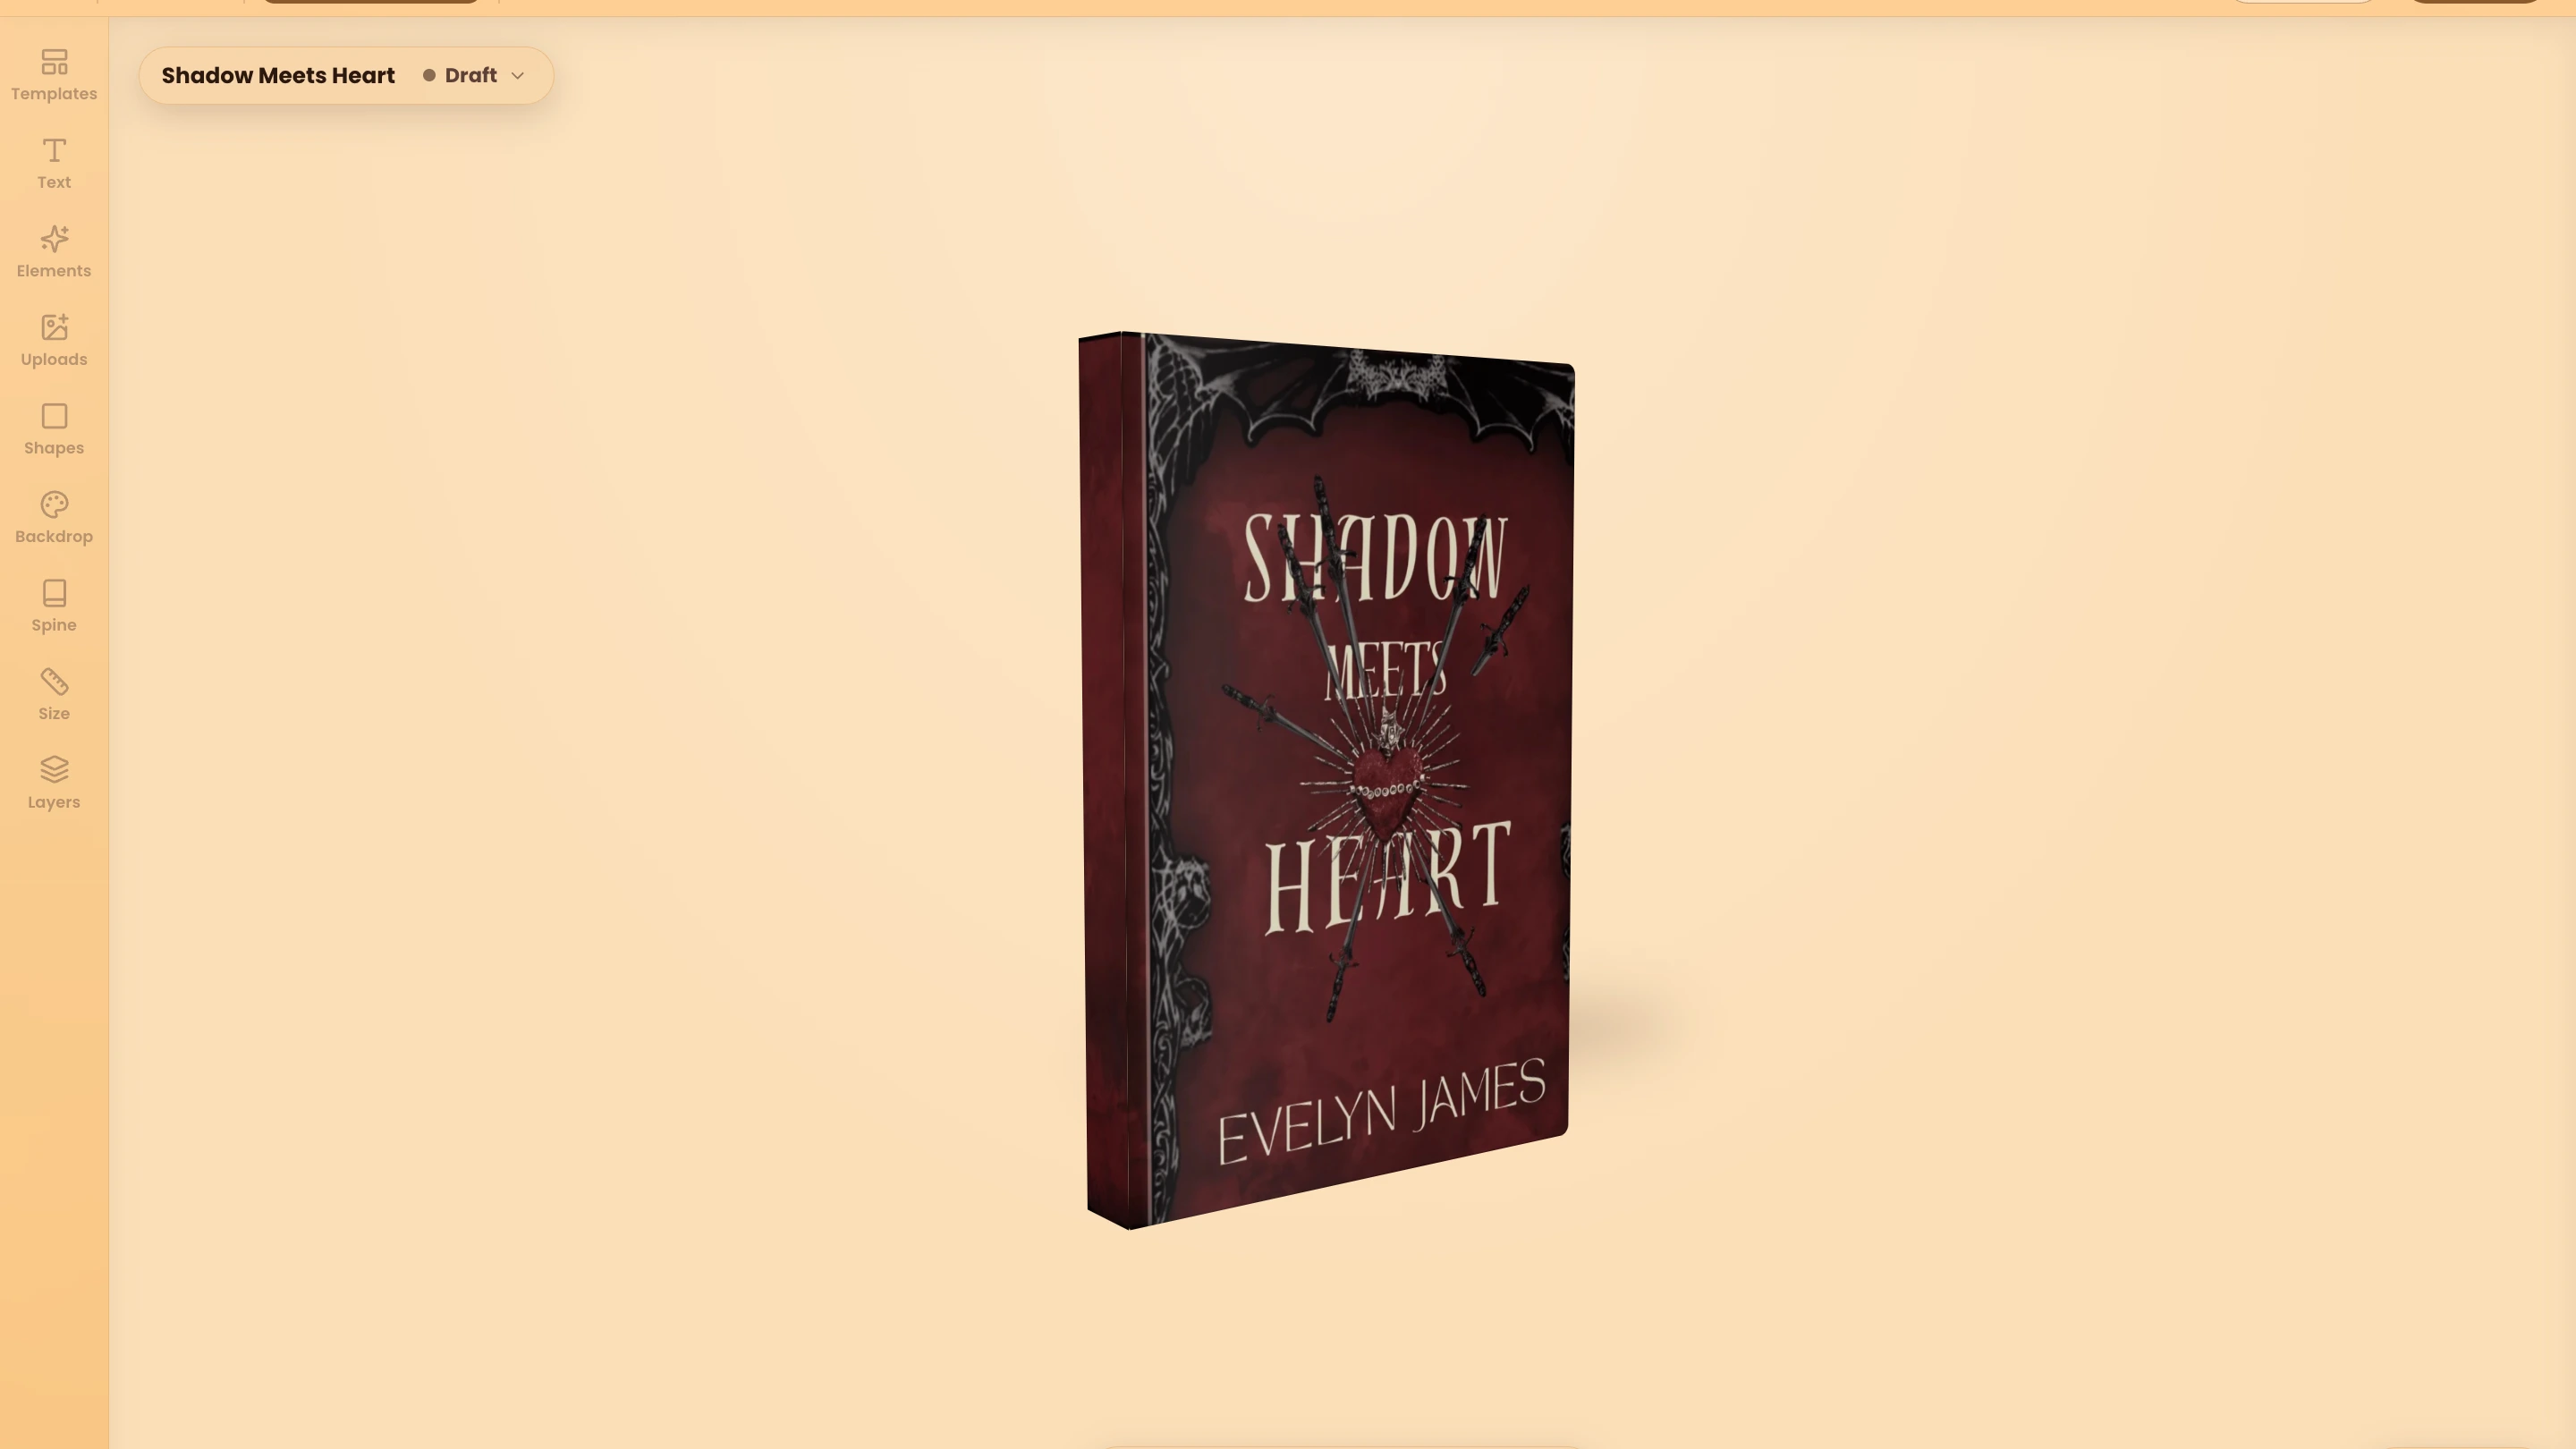
6. Open the 3D mockup to see your cover as a real book. Drag to turn it, and press Escape to go back to the front.
The guides show bleed, trim and safe area, plus the spine fold lines. Keep important text inside the safe area, since anything in the bleed gets cut off.
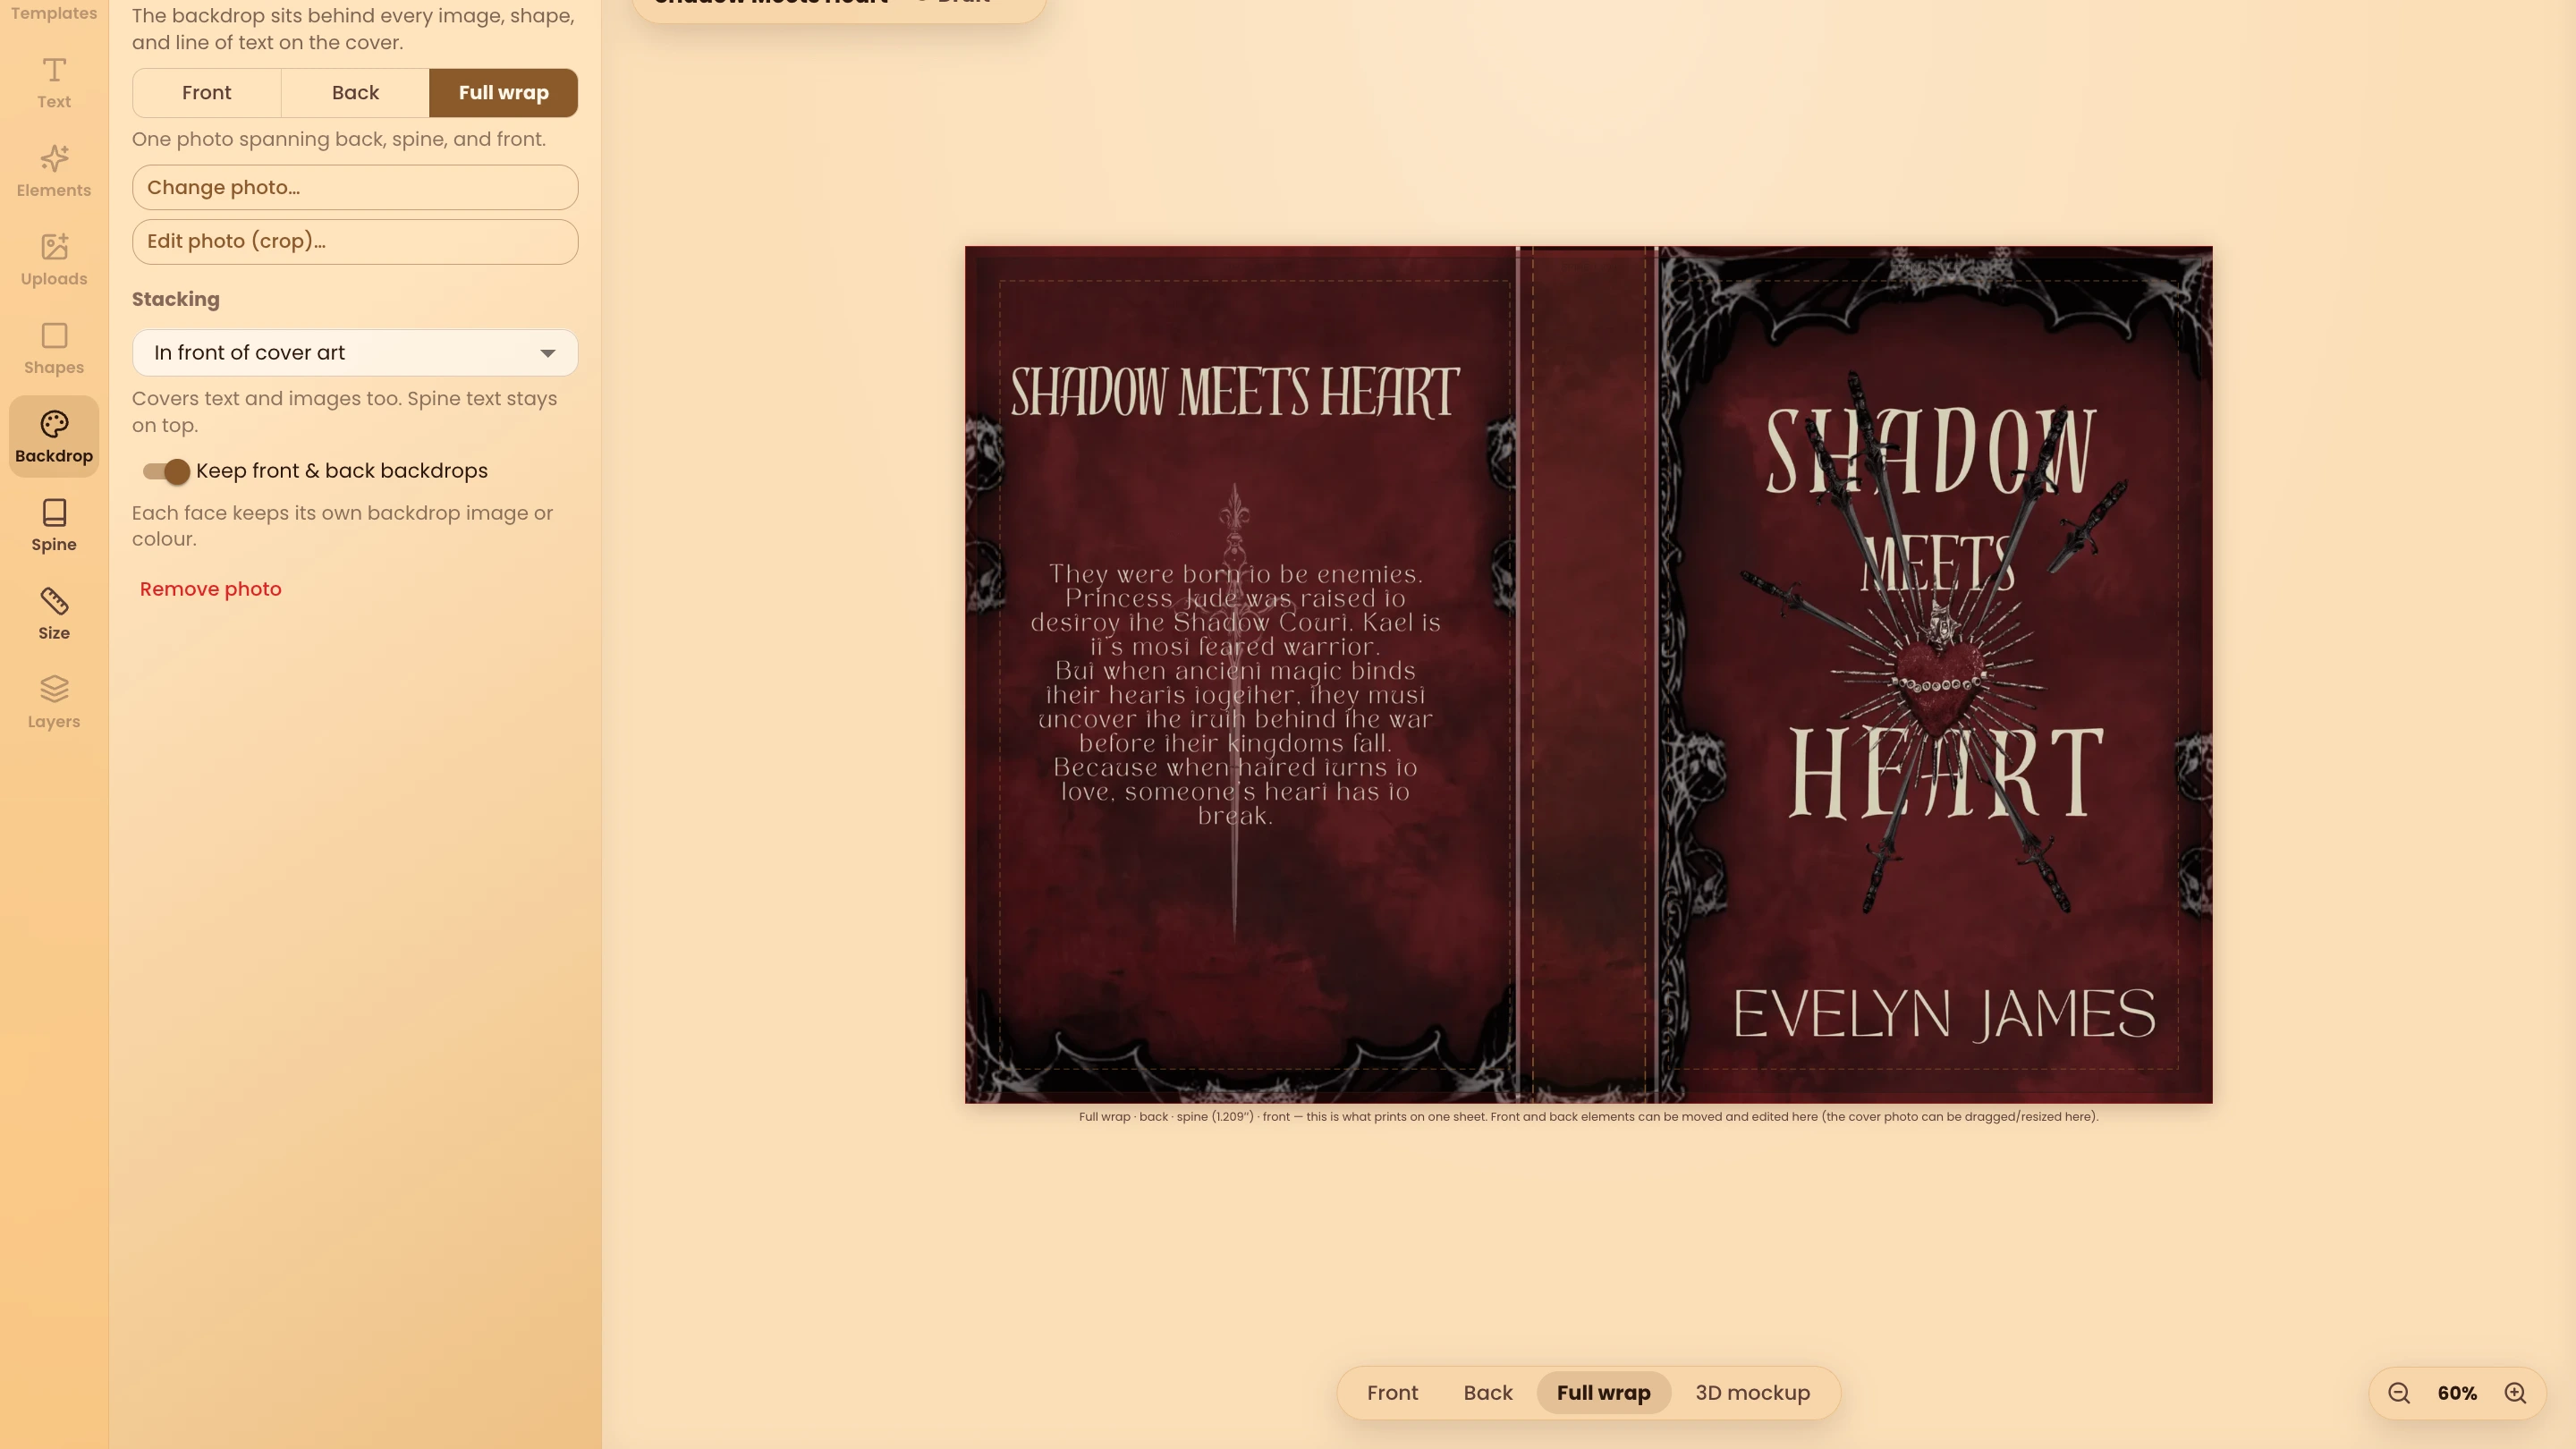
💡 Tip: The full-wrap view is for checking, not editing. To move something on the front or back, switch to that face first.
💡 Tip: Turn the 3D mockup to the spine. If the title is hard to read there, it will be hard to read on a shelf.
6. Run the Print Check
Print Check catches the problems that get files rejected.
Steps
Open the Export modal.
Run Print check.
Work through anything it flags.
Re-run it until it's clean.
It checks your gutter margin against your page count, your outside margins, whether the spine is too thin for text, and whether any image is under 200 DPI.
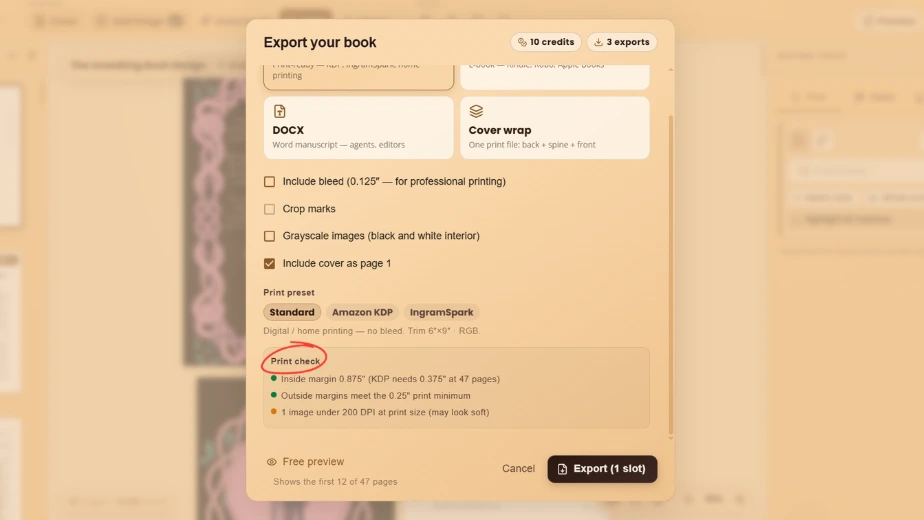
💡 Tip: Low-resolution images are the most common flag. They look fine on screen and blurry in print.
7. Export Your Book
Export the files you upload to your retailer or printer.
Steps
Open the Export modal.
Choose your format.
Generate the file and download it.
Your options:
Print-ready PDF for paperback, with bleed, crop marks and embedded fonts
Fixed-layout EPUB that keeps your exact page design
Reflowable EPUB that adapts to any screen, which is what most novels use for Kindle
DOCX if you need a Word file
Full-wrap cover PDF with back, spine and front on one sheet
You can also export the interior in greyscale while keeping the cover in colour, which is cheaper to print.
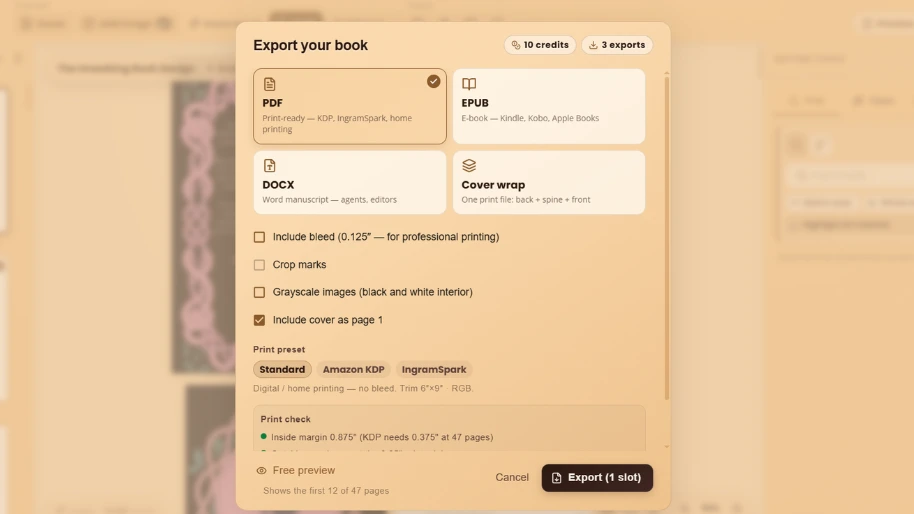
💡 Tip: Reflowable EPUB drops placed images, so check your interior artwork survived before uploading.
8. Understand Export Credits
Exporting uses credits. Designing, previewing and the watermarked preview do not.
How it works:
One credit covers four exports
Free plans get no monthly credits, PRO gets 5 a month, Lifetime gets 10
You can buy credit packs: 3 for $6, 5 for $9, or 10 for $15
If an export fails, the credit goes back to your pool
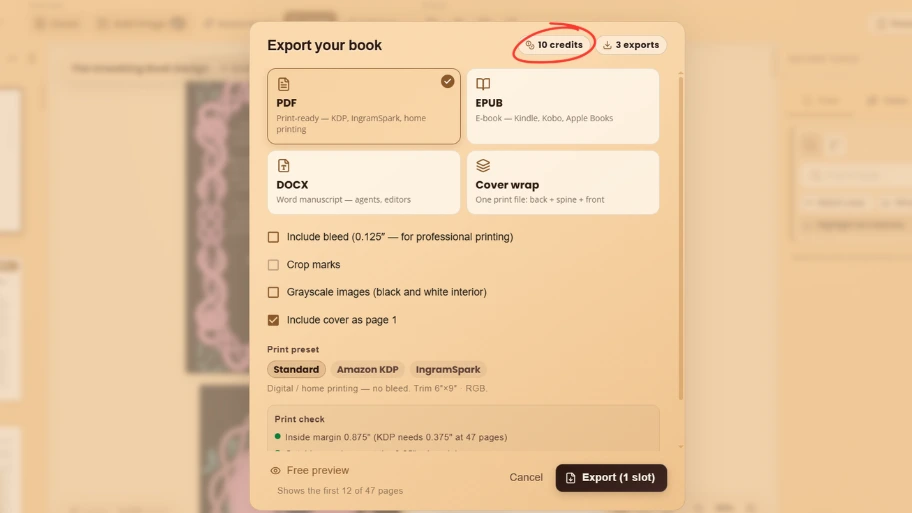
💡 Tip: Run the free preview and the print check first. Both are free, and they catch most problems before you spend a credit.
Quick Checklist
☐ Search for inconsistent names and terms
☐ Apply typographic corrections
☐ Review Insights
☐ Preview on a real device
☐ Design your front cover, spine and back
☐ Check the spine width against your page count
☐ Check your cover in the 3D mockup
☐ Run the print check until it is clean
☐ Export your print-ready PDF and EPUB
Next: Start back at Guide 1 for a new book, or open Book Designer and pick up where you left off.
Frequently Asked Questions
QHow many exports do I get per credit?
Four. One credit covers four export slots, and a failed export returns the slot to your pool.
QWhich EPUB should I choose?
Reflowable for most novels, since it adapts to any screen. Fixed-layout keeps your exact page design, which suits illustrated books.
QDo I have to re-export after editing my novel?
Yes. Your design holds its own copy of the text, so pull in the changes first, then export again.
QDoes the free preview use a credit?
No. The watermarked preview covers your first 12 pages and costs nothing.
QCan I see my cover before I print it?
Yes. The 3D mockup shows your front cover, spine, back and page edges as a real book you can turn. It's a preview, so it doesn't use an export credit.
Arya Quinn
Arya Quinn is a fantasy romance writer and the kind of reader who finishes a book and immediately needs to talk about it...